Nekoray#
Sources
Since MatsuriDayo archived his repo and it was unstable & bugged in general, we recommend migrating to better nekoray implemetation. It has less useless buttons, functions, more understable and flexible.
Install#
Installing and Configuring Nekoray
Here is a list of all available download links for Nekoray, categorized by operating system:
- Nekoray for Windows (64-bit)
- Nekoray for Linux (AppImage)
- Nekoray for Debian/Ubuntu (64-bit, package .deb)
- Nekoray for Android
Installing Nekoray on Windows#
Next, we will look at the installation process for Nekoray on Windows. Some steps may vary depending on the system, but the overall process remains the same.
Step 1: Download Nekoray
Step 2: fter the download is complete, follow these steps:
- Locate the downloaded file.
- Right-click on the file and select "Extract All…", or use an archiving tool like WinRAR or 7-Zip to extract the contents to a convenient location on your computer.
Step 3: Launching the Program
- Open the folder with the extracted files.
- Locate the file
nekoray.exe. - Double-click it to launch the program.
The program works out of the box. No installation is required.
Initial Setup of Nekoray#
Blocklist#
Go to Settings -> Route Settings -> Route
Select Default and click Edit
Click New and rename new Rules
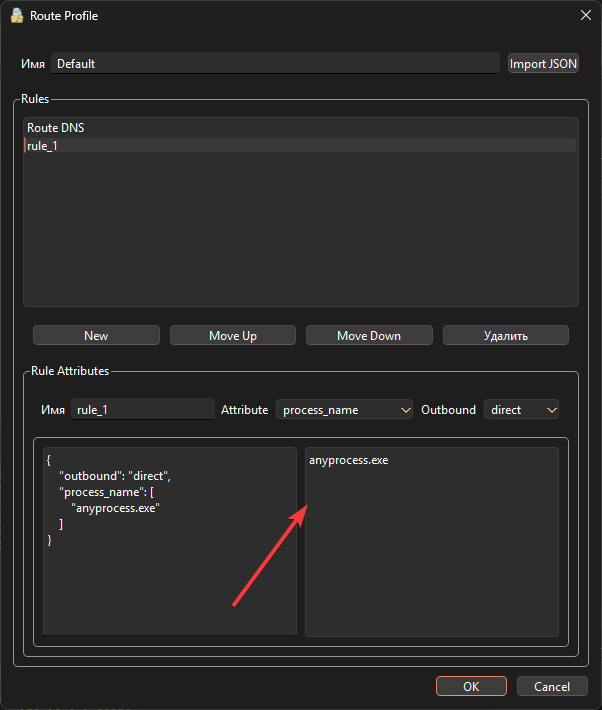
In the Name field, you can enter any name you want. In the Attribute field, select process_name. In Outbound, choose direct.
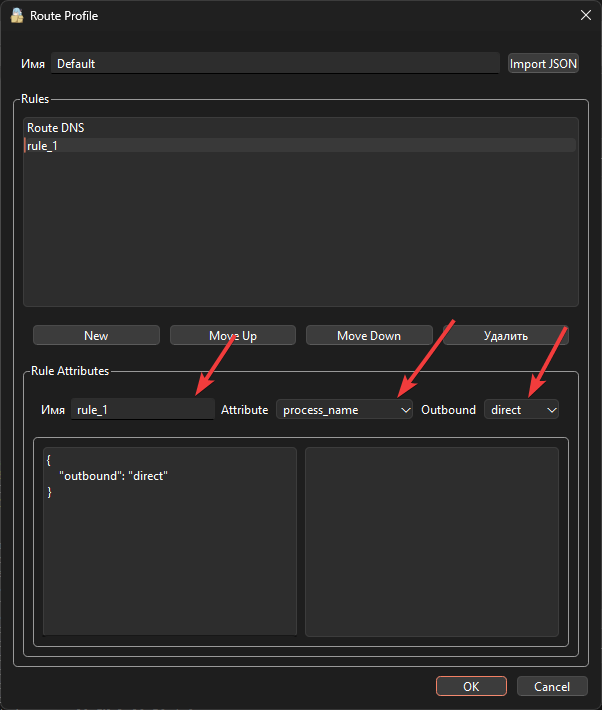
In the bottom left field, enter the process you do not want to proxy. Process names can be found in the Task Manager under the Details tab.
Warning
It is important to enter the process name with the correct letter case. If the process starts with an uppercase letter but you enter it in lowercase (or vice versa), it will not work.
Whitelist#
Go to Settings -> Route Settings -> Route
Click New, write name for your new Route in field Name
Add new Rule. Select Attribute -> process_name and Outbound -> proxy
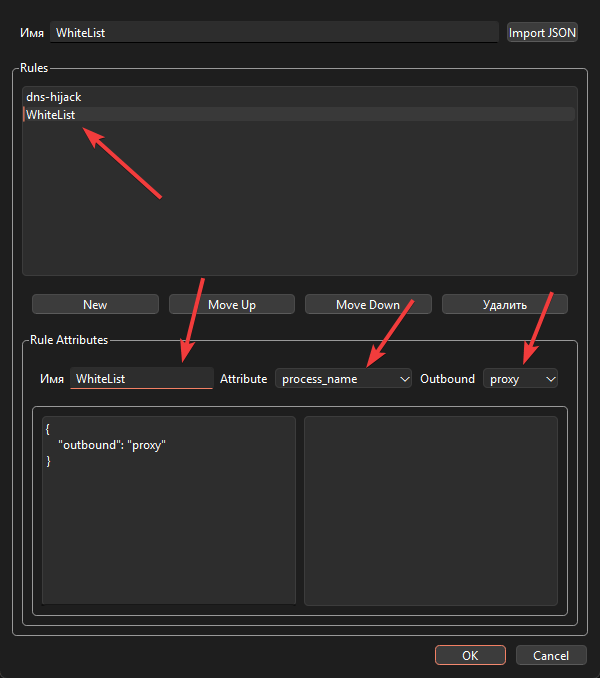
In the left field, enter the processes you want to proxy.
Warning
It is important to enter the process name with the correct letter case. If the process starts with an uppercase letter but you enter it in lowercase (or vice versa), it will not work.
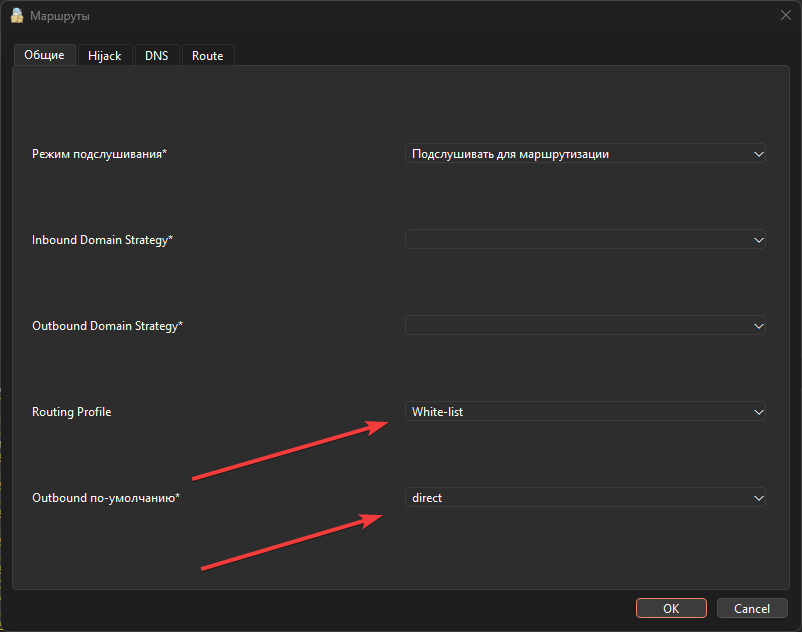
Save the settings, and then in the route settings, under General, select our profile in Routing Profile, and set Outbound to direct.
Initial Setup of original Nekoray#
Danger
Nekoray published by MatsuriDayo is no longer supported and is archived. Please, migrate to Mahdi-zarei's one
- Core Selection:
When you launch the program for the first time, make sure to select the sing-box core.

This is necessary for proper functionality. If you were not given this choice or selected something other than sing-box, you can check or change it in the settings:
- Click on Settings
- General Settings
- Navigate to the Core tab
- Select
sing-box.
-
Adding a Profile
-
Copy the profile link for the VPN connection.
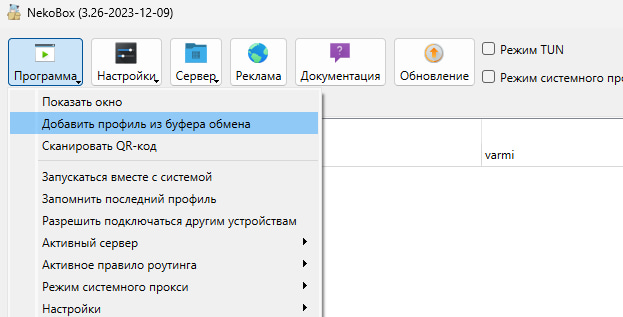
- Paste it into Nekoray using the shortcut Ctrl + V or through the menu:
- Click on the Server button.
- Select the option Add Profile from Clipboard.
Now we have three scenarios:
-
If you only need to proxy the browser. This works for any version.
-
If you need everything to be proxied, select "TUN Mode". We’ll go into more detail about configuring this below. This is only relevant for version 3.26 or older.
Scenario 1#
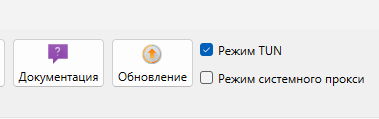
System Proxy mode
- Right-click on the profile.
- Select Start.
- At the top, you will see System Proxy Mode — turn it on.

Done.
Scenario 2#
For 3.26 version
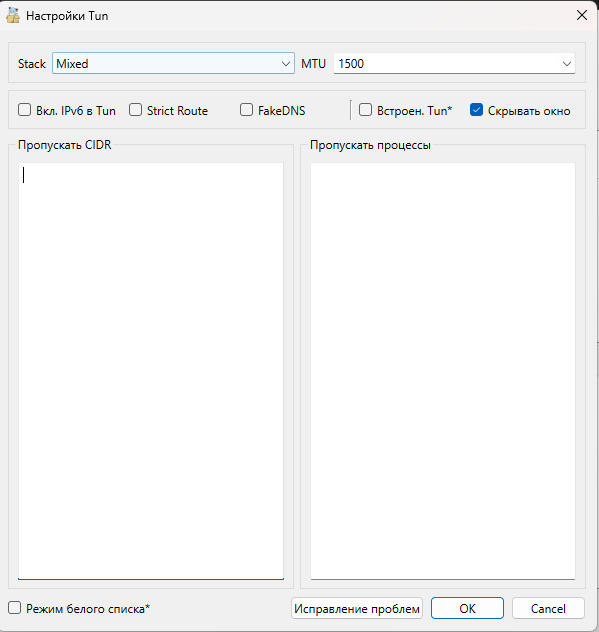
- Go to the Settings tab.
- Open TUN Mode Settings.
- Configure the following:
- Stack: Mixed
- MTU: 1500 (you can leave it at 9000, but we recommend 1500).
- Mode TUN: Turn off.
although in original versions of nekoray, whitelist/blocklist doesn’t work at all
Next:
- Right-click on the profile.
- Select Start.
- At the top, you will see TUN Mode — turn it on. You will be prompted to restart the program as an administrator. Confirm.